The Play Jar
>> Thursday, April 22, 2010
Over at Chasing Cheerios there's a great post about creating an Art Jar. I really liked this idea and decided to
(It's actually more like a Play Goldfish Bowl, but just go with me here, ok?)
I expanded just a bit on it and added activities like:
- Painting our nails
- Going for a walk
- Playing in the backyard
- Going to the park
- Playing with puzzles
We'll pick an activity out at breakfast and that's the activity we'll do the next day. (That way if I have any prep work to do, I have some time to prepare!) We've done a few activities from the jar already like mosaic artwork, playing a game, but the one we really had fun with was the salt dough clay.
My original intention was to make beads that Nani could paint and string into necklaces. That was a huge bust. No matter how big I made the holes, they closed up during baking. Out of the 4 dozen or so beads I made, I was only able to salvage about 12.
So, I had a bunch of leftover dough and didn't want to make any more beads, so I let Nani go to it with cookie cutters. (I would have had pictures of this project, but remember that my camera card decided to go all tempermental on me! I did get some pictures of the painting though.)
We made princess crowns, glass slippers, a castle (which was a haunted house cookie cutter. We made two and I attached them together!), a pumpkin carriage, and then we did the girls' handprints.
Here's the recipe:
Self-Hardening Salt Clay:
1 1/2 C salt
4 C flour
1 1/2 C water
1. Mix the dry ingredients together in a plastic bowl; then add water gradually
2. Knead dough well, adding water as needed until you get a smooth ball of dough
3. To bake clay, set oven to 300 F and bake small shapes for 30-40 min. until hard. (For cookie cutter shapes, I found that 45-50 min. did the trick)
Have fun!


12 comments:
I love this idea, thanks!!
When making the beads poke a tooth pick through and then leave it in while you bake. You can remove tooth pick afterwards. Make sure to dip the toothe pick in oil first so it slides out.
What a wonderful idea! I'll keep that in my memory bank. Thanks also for the recipe.
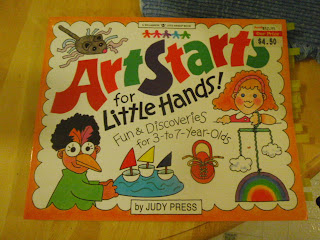
What great ideas! Thanks so much for sharing them! We have the top art book, and it's great!
love this idea!!!! stealing it :)
Oh, I love your play goldfish bowl! ;-) Our version of this is our inspiration wire. So much fun!!!
I keep thinking of having the same - now we have more of activity cards that Anna can choose from. The clay cookies look really nice!
Fun idea! I am becoming a stay at home mom in about 5 weeks and I can't wait to do fun stuff with my son! Thanks for following my blog and I am following you back!
I don't have kids yet, but I still keep a 'play jar'....it's really more of a list of things to do/projects etc. ;o) I'm sure the kiddos LOVE this!
This is too cute! What a great idea!!
~Morgan
Meet Virginia!
Meet Virginia!
Meet Virginia!
This play jar idea is so neat! Thanks for sharing. I'm gonna have to remember that one.
I love this idea! I think I'm going to copy it...
Post a Comment