Showing posts with label Crafts. Show all posts

Spring Break - Puffy Sidewalk Paint

>> Sunday, March 29, 2015

This upcoming week is Spring Break for my girls.  I'm really looking forward to having them home with me!  We don't have much planned....no big vacations, no day trips.....but I do have some fun stuff planned for us here at home -- a mani/pedi day, taking them to get their haircut, taking them to see Cinderella. 

It's also Holy Week -- so I'll be having the girls help me out in the kitchen as I do a lot of preparation for Easter -- baking bread, making stuffed cabbage & more.

One fun thing I did yesterday to kick off Spring Break for Nudgie & her little friend was make some puffy sidewalk paint.  You can pretty much Google it and come up with all kinds of ideas/recipes.  Ours is pretty simple.
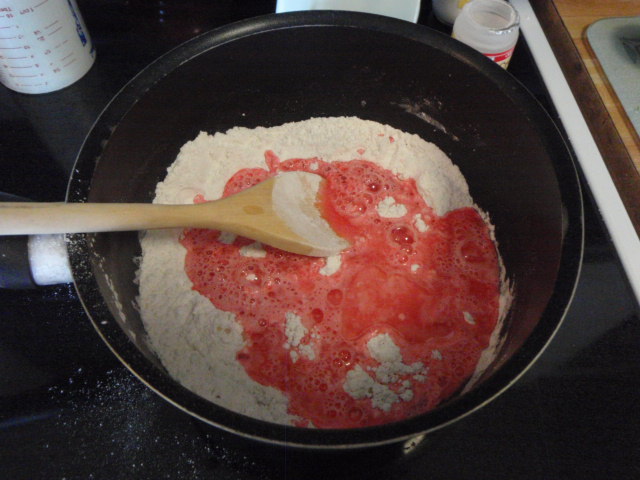


*  1/3 cup cornstarch
*  1/3 cup baking soda
*  1/3 cup water
*  coloring of your choice (food colors or washable liquid watercolors)
*  spray bottle with vinegar
*  condiment squeeze bottles

I used liquid water colors because they clean up easily with water and don't stain.  If you choose to use food coloring, just be aware that they may leave staining behind, so I'd recommend trying it first on a part of your sidewalk/driveway before going full out!

Mix all in a bowl and pour into squeezable condiment bottles.  (I picked up mine at The Dollar Tree).  Then I filled a plastic squeeze bottle with some vinegar, took everything outside and let them unleash their inner artists!


As they finished their creations, we'd take the vinegar bottle and lightly spray over it.  I'll admit, at first, I was a little disappointed that there wasn't more of a reaction.  The vinegar just made everything run together (check out the yellow sun in the photo above)  But trust me.....BE PATIENT!  You won't be disappointed!  Once it dries, it puffs up a little more and dries up with a chalky texture.


The bonus?  It all washes away with water so you can make more and create again another day!

I'll definitely be adding this to our Summer Bucket List!

Read more...

Easter Tree

>> Saturday, April 7, 2012

With our recent road trip to Portland, I didn't get much Easter/Spring decorating done around here.  My Marine did pull the boxes down, but I just didn't have the time to put anything up.  We did, however, manage to get our Easter tree decorated......or at least the girls did!

We also needed a tree topper.  So, I gave Nani an empty Crystal Light container and asked her if she could make a bunny out of it.  Let me know what you think......


So, at least I've got some "spring-y" decorations up!

Read more...

Craft Fail & Massacre on Sesame Street

>> Friday, March 16, 2012

Remember this wreath that I made a few weeks back?


Well - a lapse in crafting judgement and forgetting how the sun hits my front door full force for nearly 6 hours a day has turned it into this:


Note the melted and missing crayons.  Now my dear friends on Facebook tried to cheer me up saying that it fits well with the message of the wreath -- and I have to agree.  And while my wreath now looks like something that Salvadore Dali would create (think melted clocks people....)........my front door looks like a crime scene from Sesame Street......


These photos were brought to you by the letters C - S and I


Read more...

"Please Excuse the Mess" Door Wreath

>> Thursday, January 26, 2012

I love, love, love that quote - "Please Excuse the Mess, Children Making Memories".  I've seen wall hangings with that quote -- and there are some cute ones out there.  I didn't want a wall hanging though.  I wanted something to stand out....something that you would see right away as you entered our home.  So I thought about how I could turn this into a wreath.

I think I succeeded!


Our front door is a dark green.  I wanted something that would look good on the door but yet still express that we had kids in the house.  And you can't go wrong with primary colors!

I took a foam wreath form and wrapped it with a base of white yarn and then wrapped individual strands of primary colored yarn once around it.


I had these wood plaques that I was going to use for another project, but I didn't use them, so they were still sitting around.  I painted them green.


Then, using some letter stickers and other embellishments from my massive stash, I spelled out the quote over the two plaques.  A couple of crayons and a little hot glue and viola!  Adorable front door wreath!


So now that it's officially on my door - that gives me a pass for skipping the housework......right??


Linking up at "A Crafty Soiree"


HookingupwithHoH

Read more...

Prayer Rocks

>> Friday, November 4, 2011

Don't Forget To Sign Your Kiddos Up For The
2011 Kiddie Christmas Card Exchange!
To sign up, click HERE

*****************************************************

Last month, I had a fabulous "Girl's Night In" with my good friends Robin and Stephanie.  We met at Robin's house and over coffee and pumpkin bread talked and laughed about everything ranging from Sister Wives to our experiences at Women of Faith.  It was a great evening and one that we vowed to try to continue on a monthly basis.

Last night was my turn to host and I told the girls that they had to come in pajamas too!  I brewed a pot of pumpkin spice coffee and made this AWESOME almond-peach cake that I found while wasting time on Pinterest looking for recipes.  (The recipe called for canned cherries, but I made it with peaches instead....and OH MY YUM!!) 

Sorry -- where was I?  (Wiping drool from my face....)  Oh yeah.....Girls Night In.

So coffee and cake were made and the girls showed up.  I wanted to do something a little different, so I thought it would be fun to do a craft.  For about a year now, I've been wanting to do prayer rocks.  I had all the supplies in a bag sitting in my basement for that long.  You know - the proverbial "I'll get around to it". 

Well last night, I pulled out that bag - complete with rocks, baskets, ribbon and silver Sharpies.  And so, over coffee and cake, we wrote inspirational words on our rocks and talked about why we were writing them.  It was so much fun as we all searched for the perfect rock and the perfect word.  One of us would say a word and the rest of us were like, "Oh, that's a good one....." and proceed to "borrow" it.

In the end, it was a great evening with great results.  (Stephanie left before I could take a picture of her basket.)


We all chose words such as pray, trust, faith, hope, health, acceptance, grace, glory, love, and more.

I'm really happy with how they turned out.  As Robin was leaving last night, she mentioned that she might do something similar for her boys.  And I thought -- that's a GREAT idea.  So, I think that's one project I may do with the girls this weekend!!  (Thanks for the idea Robin!)

And I'm already looking forward to next month's gathering!!!

Read more...

Maternity Underwear Mummies

>> Monday, October 3, 2011

So, I had some time on my hands while my computer was down.  I decided that I needed to keep my hands busy - and shoving chocolate into my mouth was not an option.  So, I did the next best thing......I crafted.

First up -- Maternity Mummies

Ever wonder what crazy things you could do with all those vases you have cluttering up the garage?  Or what about all those extra pair of gauzy maternity underwear the hospital sends you home with after you've had your baby?  What a combination the two make!

All you need is some maternity underwear (unused, of course), a vase, a hot glue gun and some google eyes.  Just wrap and glue!  (Watch out for glue gun burns!)


I like using the gauze a little better because it stretches easily and fits over the top of the vase.  I tried this with recycled ACE bandages, but it didn't work as well.  It just looked like a vase wrapped in an ACE bandage.

And never would I have imagined recycling maternity underwear this way!

Read more...

Kool-Aid Playdough

>> Sunday, August 28, 2011

I've been wanting to make Kool-Aid playdough for quite awhile.  I could only imagine how good it smells!  So yesterday, I finally pulled out the Kool-Aid packets I've been hoarding and only after one trip to the grocery store because I ran out of salt, we had a rainbow-array of playdough!

And it's so easy to make!


What you need: 

1 cup flour
1/4 cup salt
2 Tbs. cream of tartar
1 packet unsweetened Kool-Aid
1 Tbs. oil
1 cup water

In a medium sauce pan, mix your dry ingredients (flour, salt, cream of tartar, Kool-Aid)


Then add your liquid ingredients and stir.  (Side note:  I used the lemonade mix for yellow and ended up having to add some yellow food coloring to brighten it up a bit.)


Continue to stir over medium heat until dough starts to form a ball


Once you get the ball, dump onto a clean surface and let cool for a minute or two.  (While cooling, make sure you dance around the kitchen singing "Playdough!  Playdough!"  This is a very important, key step in making sure your playdough turns out suitable for little hands!)


Once cooled, knead a few times to make smooth.  (Sorry, didn't get any pictures of this process.  But I think you get the gist of it!)  Once smooth, take a big sniff and swoon over how good this playdough really smells!


I picked up some tupperware containers at the Dollar Tree and they fit perfectly!


And play!!!  What I love about this recipe is that it makes very soft playdough......very easy for little hands to squish and manipulate!


Montessori Monday


The Stuff of Success


Tickled Pink at 504 Main

Read more...

When Insomnia and Crafting Collide - Patriotic Wreath

>> Sunday, June 12, 2011

I couldn't sleep last night.  I was so tired, but I just couldn't sleep.  So, I pulled out the crafting supplies and got to work! 

I had this wreath form sitting in a box in my laundry room for awhile.  Before My Marine left, I asked him to measure out 9 spaces on the wreath for me.....which he did using formulas and equations that would probably put NASA to shame.


Then I started wrapping it with red, white, and blue yarn.  I found this really cool "boucle-like" yarn on sale at Jo-Ann's a couple weeks ago.  Nani calls it the "bumpy" yarn.  I just think it added a bit more texture to the wreath.


Then I made a bunch of red, white, and blue felt rosette flowers and glued some stars in the center.


And then about midnight - like a crazy woman - I hung it on my door and took pictures!


Then I tried to sleep - and failed - so then I started working on my second craft.......stay tuned!

Read more...

Bubble, Bubbles, Bubbles

>> Thursday, June 9, 2011

So, I'm determined to stay super busy while My Marine is gone.  And with Nani out of school and underfoot home all day, I need to turn to my trusty summer bucket list for guidance!

First up - the bubble refill jar. 


Last summer I really hated having to refill those small bubble bottles from the big bubble bottles (say that five times fast).  They spilled everywhere, my hands were forever sticky, and I had to chase the dog away so that she didn't lick up the bubble solution.  (And thanks to My Marine, the girls now think that if the dog drinks bubble water, she'll fart bubbles.....)

I found this beverage container at the thrift store for .50.  (Can you tell I'm a big fan of my thrift store?!) 


 Then I added some letter stickers, slapped on some Mod-Podge, waiting for it to dry and added the bubble solution.  Viola!  Quick, easy....and the girls can do it by themselves!  (And no more bubble water for the dog....)


Happy Bubbles!!!

Read more...

What I'm Reading Now

Might As Well Laugh About It Now
0 of 5 stars true
tagged: currently-reading
Plum Spooky
0 of 5 stars true
tagged: currently-reading
Through the Grinder
0 of 5 stars true
tagged: currently-reading

goodreads.com
BlogWithIntegrity.com

Followers

Recent Visitors

    © The Toy Box Years. Friends Forever Template by Emporium Digital 2009

Back to TOP